About this deal
The compression joint screw cap was then tightened pinch tight to secure the waste pipe in place. Advice on plastic compression wastes and how they go together can be seen in our project here. With the tiles removed the wall was also inspected closely. Again, long term moisture ingress had caused considerable damage so we also pulled a section of wall away and replaced it. As we have mentioned installing a new shower tray with the waste in the same position as the old one should minimize potentially a great deal of work.
Shower by Di Vapor - Cascade One Person 90cm x 90cm Steam Shower by Di Vapor - Cascade One Person
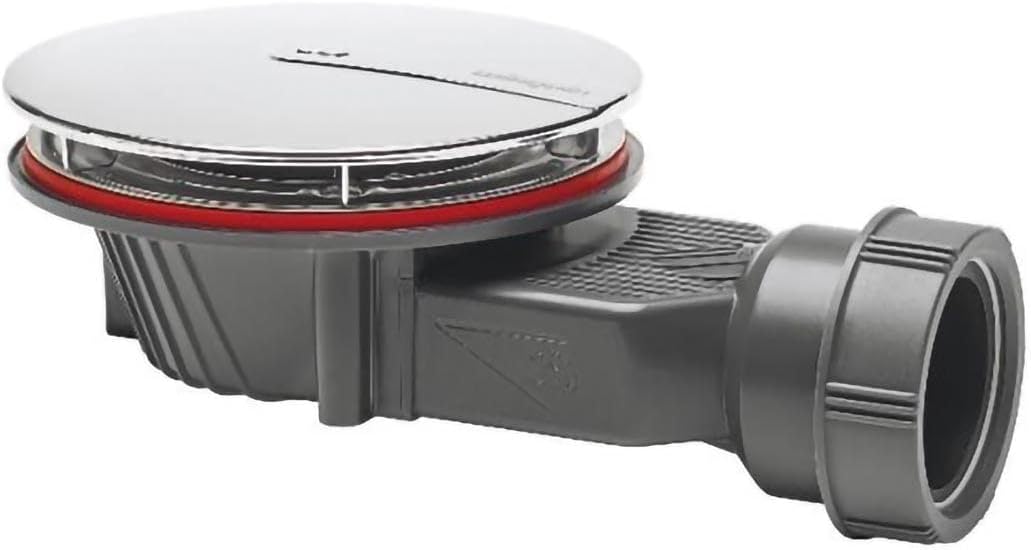
In this example we will be replacing an old 900×900 quadrant shower tray with a new 900×900 low level quadrant shower tray. Due to the damp damage to the walls we had to remove quite a few tiles, not only as they were loose, but also to replace the damaged sections of wall. The first job is to remove the old tray if it’s still in place. Depending on how it’s fixed, this can be fairly straightforward or a bit of a nightmare. Next, mark the floor area inside the tray waste so that you know exactly where you need to cut the hole for the waste. Before you start, you need to make sure that the floor beneath the tray is capable of supporting it. It needs to be completely firm, with no flexibility as this can cause problems. Mark out where the tray is going to go and replace any floorboardsin this area with marine plywood that is at least 18mm. Step 2 - Cut Access HatchIn our example here we have had to remove a chunk of the floor as it was rotten so this has given us a good heads up on how the existing waste runs. Once the tray has set and is fully secured, the waste can now be connected up. In this case we were using the existing waste so we pushed the end of the waste pipe up under the floor (with the screw cap, washer and tapered rubber seal in place) and using a torch, located it within the connection on the tray’s waste trap. When connecting into your main drainage point, in most cases it will be a 110mm plastic/PVC soil pipe as we are here. This is a fairly easy job as you can use a strap on boss. A small channel was also cut at the front of the hole as the waste connection protruded out of the waste by a few inches.
Slim Ø90 mm - Chrome Dome, the - Wirquin
The final task once the internal sealing is done is to then seal the gap at the front between the shower tray and the floor. This way you can then use the existing waste, minimizing the amount of work needed as repositioning a waste pipe can be a nightmare as you never quite know what’s going on under the floor! Remove old tray, inspect the shower area and repair any damage As we had to replace most of the floor area that the tray would be sitting on, this gave us the opportunity to ensure that the floor would be totally flat and level for the tray to sit on. Once the silicone has cured you can then fix in place the remaining tiles. Don’t be tempted to tile right down to the tray, leave a 2-3mm gap. Allow the tile adhesive to cure for at least 24 hours to ensure its gone off properly. By tiling down to the tray and leave a 2-3mm gap between the tiles and the tray you can fully seal this with silicone and allow for any expansion and contraction as the silicone itself will absorb this and reduce the risks of any leaks.Simply drill a 57mm hole in the soil pipe, coat the inside face of the boss with silicone and clip it in place. That being said though, if it’s a new install and you have to get a full waste pipe in place to carry water to the main drain, this may be something you can do along with the rest of the work. In answer to whether you should install a raised or flat shower tray, it depends on a few things – the type of floor you are installing on to, location of the existing waste if there is one and how much space there is available for the tray waste.
How to Install a Shower Tray | Victorian Plumbing How to Install a Shower Tray | Victorian Plumbing
With the tray removed it was also obvious that the floor was badly damaged, so this was also cut away and then damaged joists were also removed and replaced. To find out how to fit both a raised or flat shower tray read on below. Should I install a raised or flat shower tray? After removing the old tray it was found that a long term leak had caused a fair amount of damage to the walls and floor that would all need to be replaced before the new tray was installed in place. To leave a gap to enable tiling down to the tray we fixed a section of batten horizontally level across each wall around an inch above the tray and then tiled up the wall. New ceramic tiles above a shower tray grouted and once cured gap between shower tray and tiles filled with silicone sealant
Likewise with a floating timber floor, you can almost guarantee that there will be a supporting wall or other obstacle right where your new waste needs to go! You’ll need to cut out an access hatchin the floorboards next to the tray as this will allow you to reach the waste. A jigsaw is the ideal tool for this as it’ll allow you to be more precise with your cutting. Step 3 - Cut Waste Hole
 Great Deal